In this tutorial, we are going to focus on the transferring arbitrary data using WebRTC Data Channel Protocol.
The WebRTC introduces the SCTP (Stream Control Transmission Protocol) as a way of sending data through the peer connection. SCTP is built on top of the DTLS (Datagram Transport Layer Security), which is sitting on top of the UDP stack.
We can establish the RTCDataChannel API this way:
|
1 2 3 4 5 6 7 8 9 10 |
var peerConnection = new RTCPeerConnection(); //establish peer connection using signalling here var dataChannelOptions = { reliable: false, maxTransmitTime: 3000 }; var dataChannel = peerConnection.createDataChannel("myLable", dataChannelOptions); |
And that’s it! The RTCDataChannel is established. This will happen once signaling has been performed and the connection has been successfully created.
The data channel can be in the following states:
1. connecting A default state, data channel waits for a connection.
2. open The connection is established.
3. closing The channel is being destroyed.
4. closed The channel is closed and communication is not possible.
When the other peer creates a channel, the ondatachannel event of the RTCPeerConnection object is fired. The RTCDataChannel object also provides a few straightforward events:
|
1 2 3 4 5 6 7 8 9 10 11 12 13 14 15 16 |
dataChannel.onerror = function(error){ console.log("Data channel error:", error); }; dataChannel.onmessage = function(event){ console.log("Data channel message:", event.data); }; dataChannel.onopen = function(){ console.log("Data channel opened, ready to send messages!"); dataChannel.send("Hello world!"); }; dataChannel.onclose = function(){ console.log("Data channel has been closed"); }; |
You can configure your data channel options using the second parameter in the constructor. They are:
1. reliable Guarantee or not message delivery. (TCP or UDP)
2. ordered Whether messages should be sent and received the right order.
3. maxRetransmitTime Max time to resend a failed message.
4. maxRetransmits Max number of times to resend a failed message.
5. protocol Will force a different subprotocol. Will show an error if it is not supported.
6. negotiated Whether the developer is responsible for creating data channels on both peers or the browser should perform this step automatically.
7. id Channel ID
The send method of the data channel allows to send different javascript types over the transport layer:
1. String A simpe javascript string
2. Blob A file-like format of raw data
3. ArrayBuffer A typed-array
4. ArrayBufferView A view frame of the ArrayBuffer
You can identify the type this way:
|
1 2 3 4 5 6 7 8 9 10 11 12 13 14 15 16 |
dataChannel.onmessage = function(event){ console.log("Data channel message:", event.data); var data = event.data; if(data instanceof Blob){ //handle blob } else if (data instanceof ArrayBuffer){ //handle ArrayBuffer } else if (data instanceof ArrayBufferView){ //handle ArrayBufferView } else { //handle string } }; |
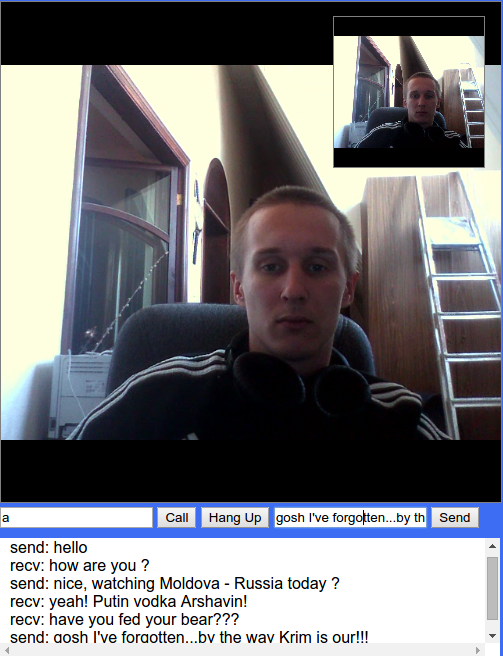
So let’s add a text chat in our application. It will look something like this:
Run our signaling server, which we created in part 3. Add the following index.html file:
|
1 2 3 4 5 6 7 8 9 10 11 12 13 14 15 16 17 18 19 20 21 22 23 24 25 26 27 28 29 30 31 32 33 34 35 36 37 38 39 40 41 42 43 44 45 46 47 48 49 50 51 52 53 54 55 56 57 58 59 60 61 62 63 64 65 66 67 68 69 70 71 72 73 74 75 76 77 78 79 80 81 82 83 |
<!DOCTYPE html> <html> <head lang="en"> <meta charset="UTF-8"> <title></title> </head> <style> body { background-color: #3D6DF2; margin-top: 15px; font-family: sans-serif; color: white; } video { background: black; border: 1px solid gray; } .page { position: relative; display: block; margin: 0 auto; width: 500px; height: 500px; } #yours { width: 150px; height: 150px; position: absolute; top: 15px; right: 15px; } #theirs { width: 500px; height: 500px; } #received { display: block; width: 480px; height: 100px; background: white; padding: 10px; margin-top: 10px; color: black; overflow: scroll; } </style> <body> <div id="login-page" class="page"> <h2>Login As</h2> <input type="text" id="username"/> <button id="login">Login</button> </div> <div id="call-page" class="page"> <!-- local video stream in the top right corner --> <video id="yours" autoplay></video> <!-- remote video stream --> <video id="theirs" autoplay></video> <input type="text" id="their-username"/> <button id="call">Call</button> <button id="hang-up">Hang Up</button> <!-- text chat --> <input type="text" id="messageInput"/> <button id="sendButton">Send</button> <div id="received"></div> </div> <script src="client.js"></script> </body> </html> |
Add the following client.js file:
|
1 2 3 4 5 6 7 8 9 10 11 12 13 14 15 16 17 18 19 20 21 22 23 24 25 26 27 28 29 30 31 32 33 34 35 36 37 38 39 40 41 42 43 44 45 46 47 48 49 50 51 52 53 54 55 56 57 58 59 60 61 62 63 64 65 66 67 68 69 70 71 72 73 74 75 76 77 78 79 80 81 82 83 84 85 86 87 88 89 90 91 92 93 94 95 96 97 98 99 100 101 102 103 104 105 106 107 108 109 110 111 112 113 114 115 116 117 118 119 120 121 122 123 124 125 126 127 128 129 130 131 132 133 134 135 136 137 138 139 140 141 142 143 144 145 146 147 148 149 150 151 152 153 154 155 156 157 158 159 160 161 162 163 164 165 166 167 168 169 170 171 172 173 174 175 176 177 178 179 180 181 182 183 184 185 186 187 188 189 190 191 192 193 194 195 196 197 198 199 200 201 202 203 204 205 206 207 208 209 210 211 212 213 214 215 216 217 218 219 220 221 222 223 224 225 226 227 228 229 230 231 232 233 234 235 236 237 238 239 240 241 242 243 244 245 246 247 248 249 250 251 252 253 254 255 256 257 258 259 260 261 262 263 264 265 266 267 268 269 270 271 272 273 274 275 276 277 278 279 280 281 282 |
//our user var name; //user connected to us var connectedUser; //setup a connection to websocket server var connection = new WebSocket('ws://localhost:9090'); connection.onopen = function(){ console.log("Connected"); }; //handling messages we got from the server connection.onmessage = function(message){ console.log("Got message", message.data); var data = JSON.parse(message.data); switch(data.type){ //check for login success case "login": onLogin(data.success); break; //when a user wants to connect to us case "offer": onOffer(data.offer, data.name); break; //when we send offer to a user and he send back an answer to us case "answer": onAnswer(data.answer); break; //when remote user sends us an ice candidate case "candidate": onCandidate(data.candidate); break; //when remote user leaves us case "leave": onLeave(); break; default: break; } }; connection.onerror = function(err){ console.log("Got error", err); }; //alias for sending messages in json format function send(message){ if(connectedUser){ message.name = connectedUser; } connection.send(JSON.stringify(message)); } //Login implementation var loginPage = document.querySelector('#login-page'), usernameInput = document.querySelector('#username'), loginButton = document.querySelector('#login'), callPage = document.querySelector('#call-page'), theirUsernameInput = document.querySelector('#their-username'), callButton = document.querySelector('#call'), hangUpButton = document.querySelector('#hang-up'); //initially hide call page in order to show login page first callPage.style.display = 'none'; //Login when the user clicks the button "login" loginButton.addEventListener('click', function(event){ name = usernameInput.value; if(name.length > 0){ send({ type: "login", name:name }); } }); function onLogin(success){ if(success === false){ alert("Login unsuccessful, please try a different name."); } else { //if login was successful loginPage.style.display = "none"; callPage.style.display = "block"; //set up requirements for maling a webrtc connection startConnection(); } } //Starting a peer connection var yourVideo = document.querySelector('#yours'), theirVideo = document.querySelector('#theirs'), yourConnection, stream; function startConnection(){ //if the user's device supports webrtc if(hasUserMedia()){ navigator.getUserMedia({video: true, audio: true}, function(myStream){ stream = myStream; //add local stream in the top right corner yourVideo.src = window.URL.createObjectURL(stream); if(hasRTCPeerConnection()){ setupPeerConnection(stream); } else { alert("Sorry, your browser does not support WebRTC"); } }, function(error){ console.log(error); }) } else { alert("Sorry, your browser does not support WebRTC"); } } function setupPeerConnection(stream){ var configuration = { "iceServers":[{"url":"stun:stun.1.google.com:19302"}] }; yourConnection = new RTCPeerConnection(configuration, { optional: [{ RtpDataChannels: true }] }); openDataChannel(); //Setup stream listening yourConnection.addStream(stream); yourConnection.onaddstream = function(e){ theirVideo.src = window.URL.createObjectURL(e.stream); }; //setup ice handling //sending ice candidate to another user yourConnection.onicecandidate = function(event){ console.log("onicecandidate"); if(event.candidate){ send({ type: "candidate", candidate: event.candidate }); } }; } //check if the user's device supports webrtc function hasUserMedia(){ navigator.getUserMedia = navigator.getUserMedia || navigator.webkitGetUserMedia || navigator.mozGetUserMedia || navigator.msGetUserMedia; return !!navigator.getUserMedia; } //check if the user's device supports rtcpeerconnection object function hasRTCPeerConnection(){ window.RTCPeerConnection = window.RTCPeerConnection || window.webkitRTCPeerConnection || window.mozRTCPeerConnection; window.RTCSessionDescription = window.RTCSessionDescription || window.webkitRTCSessionDescription || window.mozRTCSessionDescription; window.RTCIceCandidate = window.RTCIceCandidate || window.webkitRTCIceCandidate || window.mozRTCIceCandidate; return !!window.RTCPeerConnection; } //Initiating a call to the other user callButton.addEventListener("click", function(){ var theirUsername = theirUsernameInput.value; if(theirUsername.length > 0){ startPeerConnection(theirUsername); } }); //sending offer and starting ice candidates trading //remember this process is asynchronous function startPeerConnection(user){ connectedUser = user; //begin the offer yourConnection.createOffer(function(offer){ send({ type: "offer", offer: offer }); yourConnection.setLocalDescription(offer); }), function(error){ alert("An error has occured."); }; } //when we receive an offer from another user function onOffer(offer, name){ connectedUser = name; yourConnection.setRemoteDescription(new RTCSessionDescription(offer)); yourConnection.createAnswer(function(answer){ yourConnection.setLocalDescription(answer); send({ type: "answer", answer: answer }); }, function(error){ alert("An error has occured"); }); } //when we got an answer to our offer function onAnswer(answer){ yourConnection.setRemoteDescription(new RTCSessionDescription(answer)); } //when we got ice candidate from a user we save it function onCandidate(candidate){ console.log("oncandidate"); yourConnection.addIceCandidate(new RTCIceCandidate(candidate)); } //Hanging up a call //send the other user a leave message and destroy a connection hangUpButton.addEventListener("click", function(){ send({ type: "leave" }); onLeave(); }); function onLeave(){ connectedUser = null; theirVideo.src = null; //close rtcpeerconnection and stop transmitting our stream to the other user yourConnection.close(); yourConnection.onicecandidate = null; yourConnection.onaddstream = null; //setup rtcpeerconnection again to accept new calls setupPeerConnection(stream); } //Implementing text chat function openDataChannel(){ var dataChannelOptions = { reliable:true }; dataChannel = yourConnection.createDataChannel("myLabel", dataChannelOptions); dataChannel.onerror = function(error){ console.log("Data Channel Error:", error); }; dataChannel.onmessage = function(event){ console.log("Got Data Channel Message:", event.data); received.innerHTML += "recv: " + event.data + "<br />"; received.scrollTop = received.scrollHeight; }; dataChannel.onopen = function(){ dataChannel.send(fo + "has connected"); }; dataChannel.onclose = function(){ console.log("The Data Channel is closed"); }; } //when sending a text message sendButton.addEventListener("click", function(event){ console.log("send mes!"); var val = messageInput.value; received.innerHTML += "send: " + val + "<br />"; received.scrollTop = received.scrollHeight; dataChannel.send(val); }); |
Then login with 2 users. Call one to another and try to send messages. This example works for Chome only.
That’s all. Hope this series was helpful to you.