In this tutorial we are going to write a smart contact in Solidity language that can prove file ownership.
Hi guys! So I’m starting this series of tutorials to get to grips with Ethereum and how to work with it. I highly recommend study the following docs at first(though it took me ~3 weeks it was worth it):
– Ethereum documentation
– Solidity documentation. Solidity is one of the languages for creating smart contracts(programs) for Ethereum blockchain.
– JSON RPC API. It is a protocol for communication with your mining node(server). You may just look through the methods it provides.
– Web3 JavaScript API. This is a client side API. For example you can control your node from a web browser.
Your first smart contract
We will store the hash of the file and the owner’s name to achieve proof of ownership. We will also store the hash of the file and the block timestamp to achieve proof of existence. Finally, the file integrity is achieved by storing the file hash. When you change the file its hash is also modified.
I’m going to use VS Code for writing smart contracts with this extension.
So create a new file proof.sol with the following code:
|
1 2 3 4 5 6 7 8 9 10 11 12 13 14 15 16 17 18 19 20 21 22 23 24 25 26 27 28 29 30 31 32 33 34 35 36 37 |
contract Proof { struct FileDetails { uint timestamp; string owner; } mapping (string => FileDetails) files; event logFileAddedStatus(bool status, uint timestamp, string owner, string fileHash); // to store the owner of file at the block timestamp function set(string owner, string fileHash) { // if filehash not exists then set it if(files[fileHash].timestamp == 0) { files[fileHash] = FileDetails(block.timestamp, owner); // we are triggering an event so that the frontend of our app knows // that the file's existence and ownership details have been stored logFileAddedStatus(true, block.timestamp, owner, fileHash); } else { // file's details has already been stored earlier logFileAddedStatus(false, block.timestamp, owner, fileHash); } } // get file information function get(string fileHash) returns (uint timestamp, string owner) { return (files[fileHash].timestamp, files[fileHash].owner); } } |
Compiling and deploying your first contract
There are 2 ways to compile your smart contract(the .sol file):
1. solc compiler
2. Remix – Solidity IDE.
We’re going to user Remix – the online Solidity IDE with the built in compile function.
So open Remix and paste the contract code there.
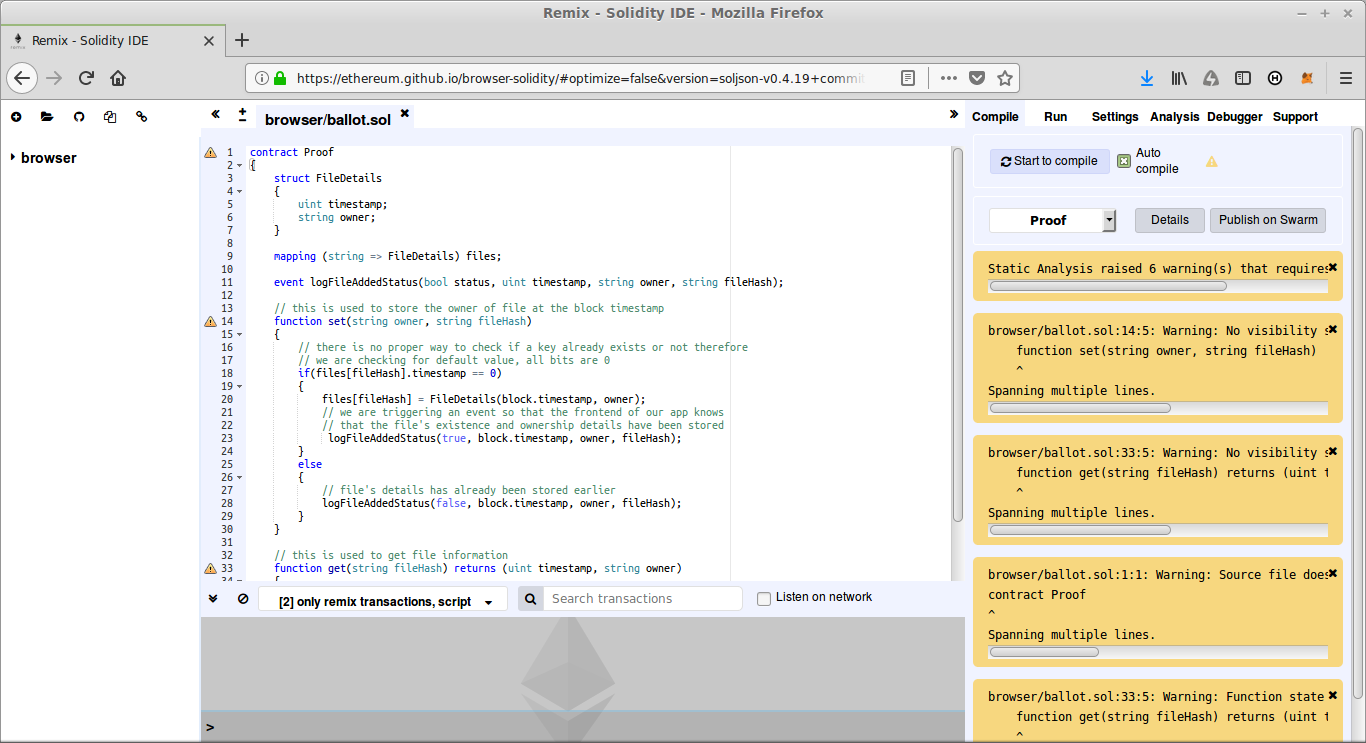
Then click on “Start to compile” and “Details”. In the “WEB3DEPLOY” section you will find the code similar to the following:
|
1 2 3 4 5 6 7 8 9 10 11 12 |
var proofContract = web3.eth.contract([{"constant":false,"inputs":[{"name":"fileHash","type":"string"}],"name":"get","outputs":[{"name":"timestamp","type":"uint256"},{"name":"owner","type":"string"}],"payable":false,"stateMutability":"nonpayable","type":"function"},{"constant":false,"inputs":[{"name":"owner","type":"string"},{"name":"fileHash","type":"string"}],"name":"set","outputs":[],"payable":false,"stateMutability":"nonpayable","type":"function"},{"anonymous":false,"inputs":[{"indexed":false,"name":"status","type":"bool"},{"indexed":false,"name":"timestamp","type":"uint256"},{"indexed":false,"name":"owner","type":"string"},{"indexed":false,"name":"fileHash","type":"string"}],"name":"logFileAddedStatus","type":"event"}]); var proof = proofContract.new( { from: web3.eth.accounts[0], data: '0x6060604052341561000f57600080fd5b6107a58061001e6000396000f30060606040526004361061004c576000357c0100000000000000000000000000000000000000000000000000000000900463ffffffff168063693ec85e14610051578063e942b5161461012e575b600080fd5b341561005c57600080fd5b6100ac600480803590602001908201803590602001908080601f016020809104026020016040519081016040528093929190818152602001838380828437820191505050505050919050506101ce565b6040518083815260200180602001828103825283818151815260200191508051906020019080838360005b838110156100f25780820151818401526020810190506100d7565b50505050905090810190601f16801561011f5780820380516001836020036101000a031916815260200191505b50935050505060405180910390f35b341561013957600080fd5b6101cc600480803590602001908201803590602001908080601f0160208091040260200160405190810160405280939291908181526020018383808284378201915050505050509190803590602001908201803590602001908080601f0160208091040260200160405190810160405280939291908181526020018383808284378201915050505050509190505061035a565b005b60006101d86106c0565b6000836040518082805190602001908083835b60208310151561021057805182526020820191506020810190506020830392506101eb565b6001836020036101000a0380198251168184511680821785525050505050509050019150509081526020016040518091039020600001546000846040518082805190602001908083835b60208310151561027f578051825260208201915060208101905060208303925061025a565b6001836020036101000a0380198251168184511680821785525050505050509050019150509081526020016040518091039020600101808054600181600116156101000203166002900480601f01602080910402602001604051908101604052809291908181526020018280546001816001161561010002031660029004801561034a5780601f1061031f5761010080835404028352916020019161034a565b820191906000526020600020905b81548152906001019060200180831161032d57829003601f168201915b5050505050905091509150915091565b600080826040518082805190602001908083835b602083101515610393578051825260208201915060208101905060208303925061036e565b6001836020036101000a038019825116818451168082178552505050505050905001915050908152602001604051809103902060000154141561059d576040805190810160405280428152602001838152506000826040518082805190602001908083835b60208310151561041d57805182526020820191506020810190506020830392506103f8565b6001836020036101000a03801982511681845116808217855250505050505090500191505090815260200160405180910390206000820151816000015560208201518160010190805190602001906104769291906106d4565b509050507f0d3bbc3c02da6ed436712ca1a0f626f1269df703a105f034e4637c7b10fb7ba5600142848460405180851515151581526020018481526020018060200180602001838103835285818151815260200191508051906020019080838360005b838110156104f45780820151818401526020810190506104d9565b50505050905090810190601f1680156105215780820380516001836020036101000a031916815260200191505b50838103825284818151815260200191508051906020019080838360005b8381101561055a57808201518184015260208101905061053f565b50505050905090810190601f1680156105875780820380516001836020036101000a031916815260200191505b50965050505050505060405180910390a16106bc565b7f0d3bbc3c02da6ed436712ca1a0f626f1269df703a105f034e4637c7b10fb7ba5600042848460405180851515151581526020018481526020018060200180602001838103835285818151815260200191508051906020019080838360005b838110156106175780820151818401526020810190506105fc565b50505050905090810190601f1680156106445780820380516001836020036101000a031916815260200191505b50838103825284818151815260200191508051906020019080838360005b8381101561067d578082015181840152602081019050610662565b50505050905090810190601f1680156106aa5780820380516001836020036101000a031916815260200191505b50965050505050505060405180910390a15b5050565b602060405190810160405280600081525090565b828054600181600116156101000203166002900490600052602060002090601f016020900481019282601f1061071557805160ff1916838001178555610743565b82800160010185558215610743579182015b82811115610742578251825591602001919060010190610727565b5b5090506107509190610754565b5090565b61077691905b8082111561077257600081600090555060010161075a565b5090565b905600a165627a7a72305820c043b2af6fa1169cb121c8259f7632749bb5bb63d8ecf251d142dfc62022aebc0029', gas: '4700000' }, function (e, contract){ console.log(e, contract); if (typeof contract.address !== 'undefined') { console.log('Contract mined! address: ' + contract.address + ' transactionHash: ' + contract.transactionHash); } }) |
data is the compiled version of the contract for the EVM(Ethereum Virtual Machine). The first argument to the web3.eth.contract is the ABI(Application Binary Interface) definition. The ABI contains the prototype of all contract’s methods.
Now run geth in development mode with mining enabled:
geth --dev --mine
Open another terminal window and run geth‘s interactive JavaScript console:
geth attach --ipcpath /tmp/geth.ipc
Now copy your web3 deployment code, paste in the Javascript console terminal window and hit “Enter”. You will get the transaction hash and the contract address(it may take ~15 sec). The transaction hash is…surprisingly the unique hash of the transaction. All deployed contracts have a unique contract address.
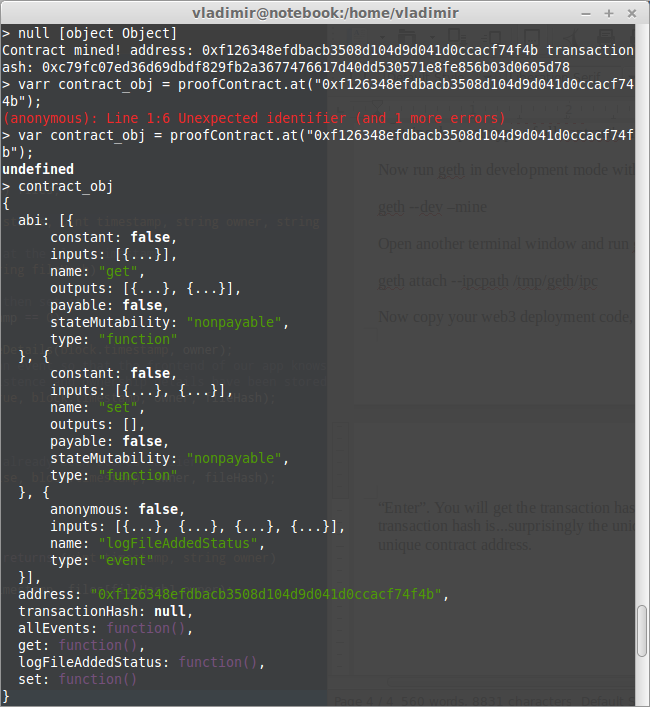
Now paste the following code to create a transaction to store file’s details:
|
1 2 3 4 5 6 7 8 |
var contract_obj = proofContract.at("0xf126348efdbacb3508d104d9d041d0ccacf74f4b"); contract_obj.set.sendTransaction("Vladimir", "hash", { from: web3.eth.accounts[0] }, function(error, transactionHash){ if(!err) { console.log(transactionHash); } }); |
You should replace the first argument of the proofContract.at method with your contract address. We don’t provide the gas so it is automatically calculated.
Now run the following code to find file’s details:
|
1 |
contract_obj.get.call("hash"); |
You will see the following output:

The call method is used to run a contract’s method on EVM without broadcasting a transaction.
That’s all for now. Have a good day!